
EA Assistant
14 min
Currently available in Cloud only.
The EA Assistant is designed to assist with the set-up of your EA practise and repository. It has a coach that can define the plays that best meet your needs, give advice on how to proceed based on your responses, create a launchpad export containing just the sheets that you need and manage the Import when you have added your additional data.
The Coach is optional, if you already know the play you want to follow you can select that and not use the coach. If you select this option you will not see the Advice tab.
Essential Assistant can also be used by existing clients that are looking to expand their EA practise. The coach can be utilised, or the next play can be selected, and the exports will contain all the existing repository data so that it can be utilised in the mapping process. Again, if you select this option you will not see the Advice tab.
If you don’t want to use the playbook you can jump straight to the Launchpad Export tab to define either the views you want to populate or the data you want to capture.
Access the EA Assistant via the Support section of the View Library.
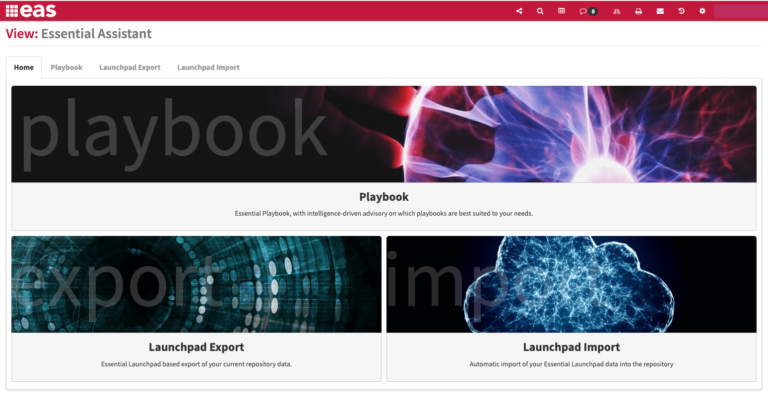
You are presented with a screen with:
- A series of tabs to work through:
- Home
- Playbook
- Launchpad Export
- Launchpad Import
- Or three sections to select from:
- Playbook
- Launchpad
- Launchpad Import
Home
From the Home screen you can either select from the tabs, or skip to the Playbook, Launchpad to Launchpad Import using the sections.
Playbook
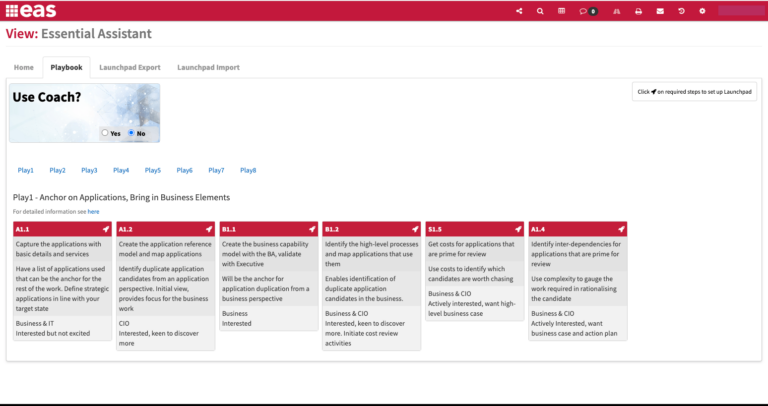
When you first select the Playbook tab or section, you can choose whether to use the Playbook Coach or not.
Playbook Coach
If you click Yes, the paybook coach asks a series of questions about your objectives, the architecture team’s maturity and standing in the organisation and the data available. Answer the questions and click submit and the EA Assistant will recommend a play that you should follow. Sometimes it will suggest two plays that you can review and select from.
Each Play has a series of steps, and you can select how many steps you will complete in one pass. If you have the data and the buy-in you could, for example, complete the play in two passes, steps 1, 2 and 3 in the first pass and then steps 4, 5 and 6 in the second pass, or you may choose to go through one step at a time. Click the rocket symbol to highlight the steps that you are going to complete, they will go green.
The full detail of each play can be viewed by clicking For detailed information see here, which is located above the play steps.

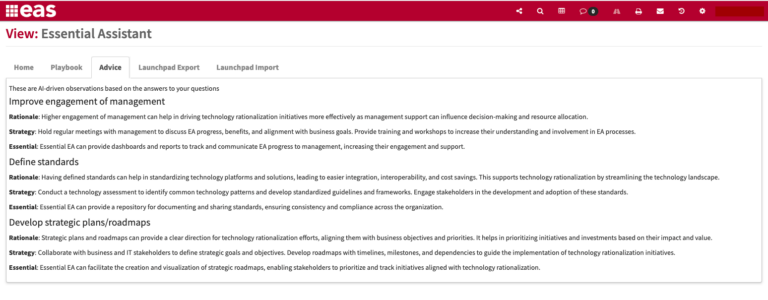
Advice
If you have used Playbook Coach once you click Submit an Advice tab will appear. This gives AI driven advice and observation dependant on the answers you have selected.
Playbook
If you already know which play you want to follow and don’t want to use the Playbook Coach, click No and you will see all the Plays that you can select from. Select the play and then select the steps by clicking the rocket symbol, they will go green.
Note: If you don’t want to use the Playbook you can jump straight to the Launchpad Export tab to define either the views you want to populate or the data you want to capture.
Launchpad Export
Launchpad Export and Playbook
If you have selected a play via the Playbook tab, the Launchpad Export tab will be pre-populated with the worksheets needed to capture the data required to populate the play and steps selected.
You can choose to download either a blank or a populated launchpad excel file. If you have existing data in your repository, we would strongly recommend that you select the populated option to avoid creating duplicates.
The box to the left of the sheet will be highlighted in green once the existing repository data, if there is any in the repository for this class, is ready to be exported. When this is complete for all the sheets selected click the orange Download Excel File button.
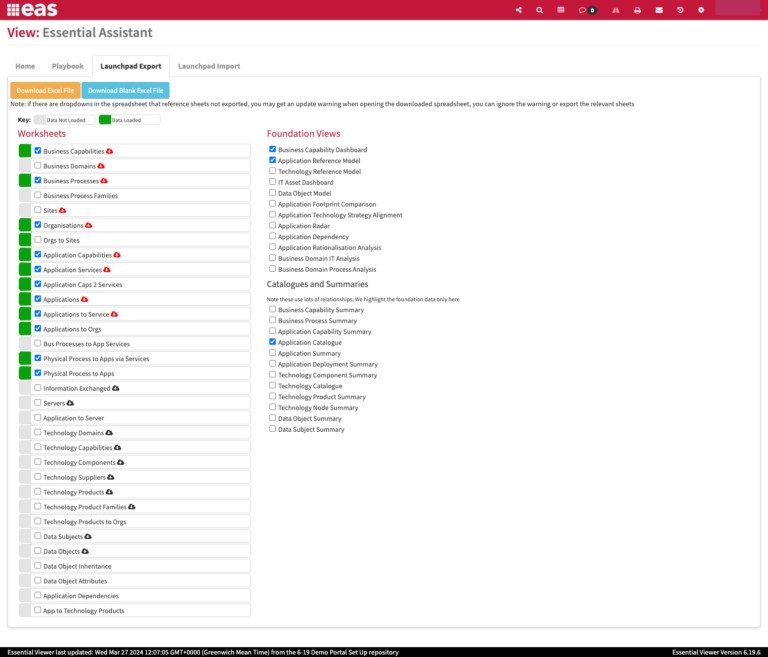
Launchpad Export
If you have come directly to this tab, you can either define the views you want to populate, in the right-hand column or the data you want to capture in the left hand column.
The box to the left of the sheet will be highlighted in green once the existing repository data, if there is any in the repository for this class, is ready to be exported. When this is complete for all the sheets selected click the orange Download Excel File button.
Updating the Launchpad Spreadsheet
Add the required data to the tabs – for more information see the Essential University – How to Use the Essential Launchpad
Note the following:
- Do not change any of the exported Launchpad IDs.
- Every item in the Launchpad definition sheets must have an ID, so if you are adding new items to a sheet that contains an ID column ensure that you add an ID if one is not already present.
- The IDs must be unique, so don’t add one that has already been used.
- If you change the name of an instance, make sure you do a ‘find and replace’ across the workbook. For example, if you have a business capability defined in the business capability worksheet that is also used as a parent in the business process worksheet, you will need to update both instances for a change of name to be successful.
Launchpad Import
The Launchpad Import tab allows you to import the data you have added to the exported Launchpad Export file.
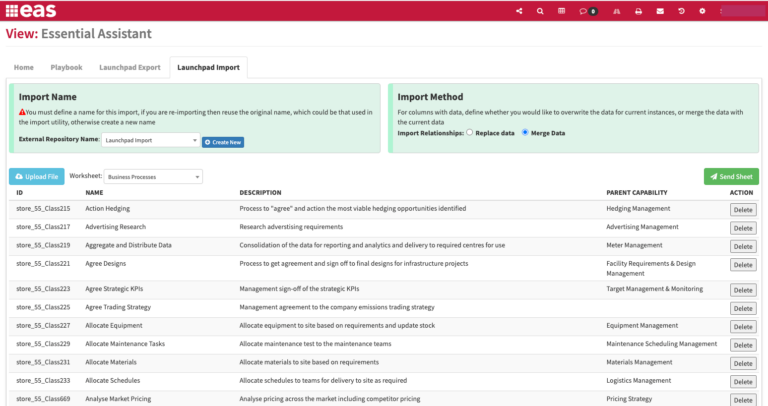
Import Name
Each import must have a name attached to it; this combines with the IDs to create a unique internal ID for an instance.
If this is the first time you have run the import then use the Create New button to add a new name.
If you have run the import before, and are updating or adding new items, then select the name from the list.
If you have used previously used the import utility to run the import you should select the name defined in the import utility from the list. If you don’t see it listed create a new name.
Import Method
There are two options for your import – Replace Data and Merge Data.
(This relates to the relationship data created, not individual instances which map on the ID.)
Replace Data
This will remove all the instances currently defined in the repository and replace them with the new ones defined in the spreadsheet.
For example, if you have already defined the application services provided by an application, this option will remove ALL those existing services and add the new ones defined in the spreadsheet. The application will provide only the services defined in the worksheet uploaded.
Merge Data
This will add instances to the existing ones defined in the repository.
For example, if you have already defined the application services provided by an application, this option will add the services defined in the spreadsheet to those already defined. The application will provide the existing services and the services defined in the worksheet uploaded.
Upload File
Click the Upload File option to select the completed Launchpad Spreadsheet.
The Worksheet box will now be populated with all the sheets that are contained in the spreadsheet.
The import is completed sheet by sheet, the order is not important as all the information required by each sheet is contained within it.
Select the sheet you want to import, ensure the Import Method is correct and click Send Sheet, you will see a message “Loading Instances… Please Wait”. When the import is complete the message disappear.
You can select the next sheet and continue until all the worksheets required have been imported.
Don’t forget that you will need to publish to see the changes in the viewer.
To create a new Portal, or update your existing portal with the selected views, see the Essential University – Viewer and Portal Set Up
Updated 27 March 2024