
BPMN Flow Editor – Beta
8 min
This Editor is released as an early access beta version and requires an optional EUP to enable, available here.
BPMN Flow Models
The BPMN Flow Editor allows you to design and capture processes using the graphical BPMN language. Here you can define the events, activities, gateways, conversations, and data objects for your business process flows. You can also customise the appearance of your flows to make data clearer or to better suit your organisation.
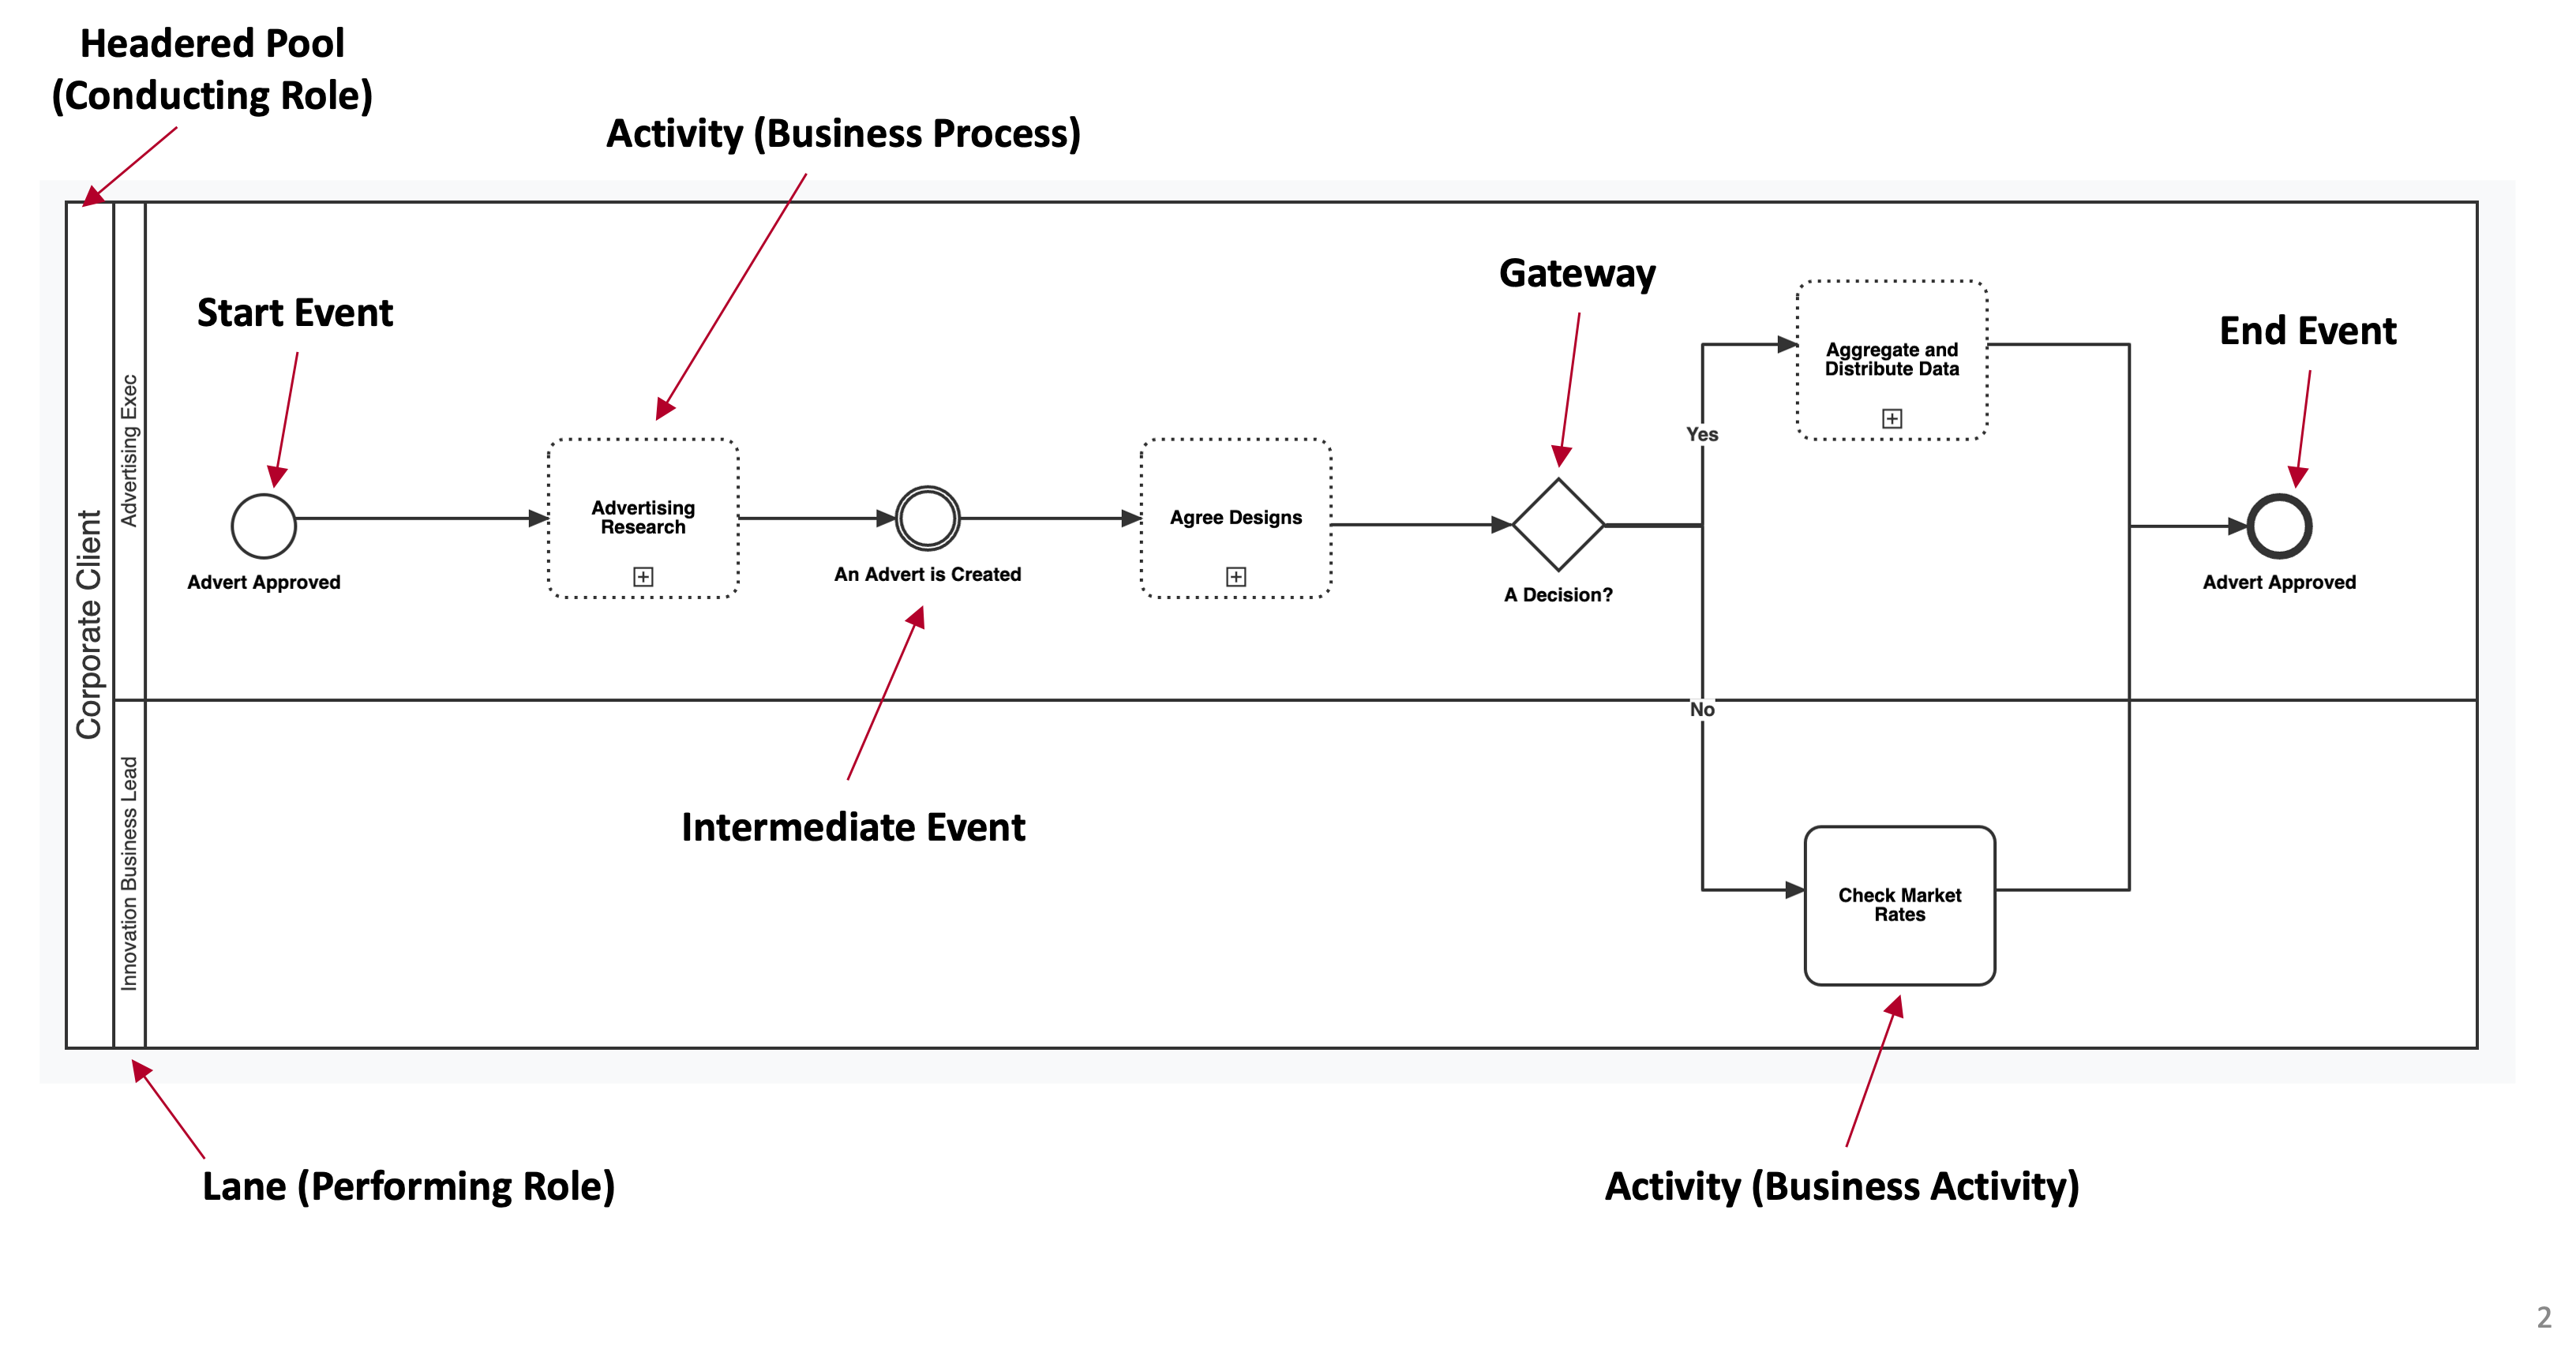
A Reference Business Process Flow
Using the BPMN Flow Editor
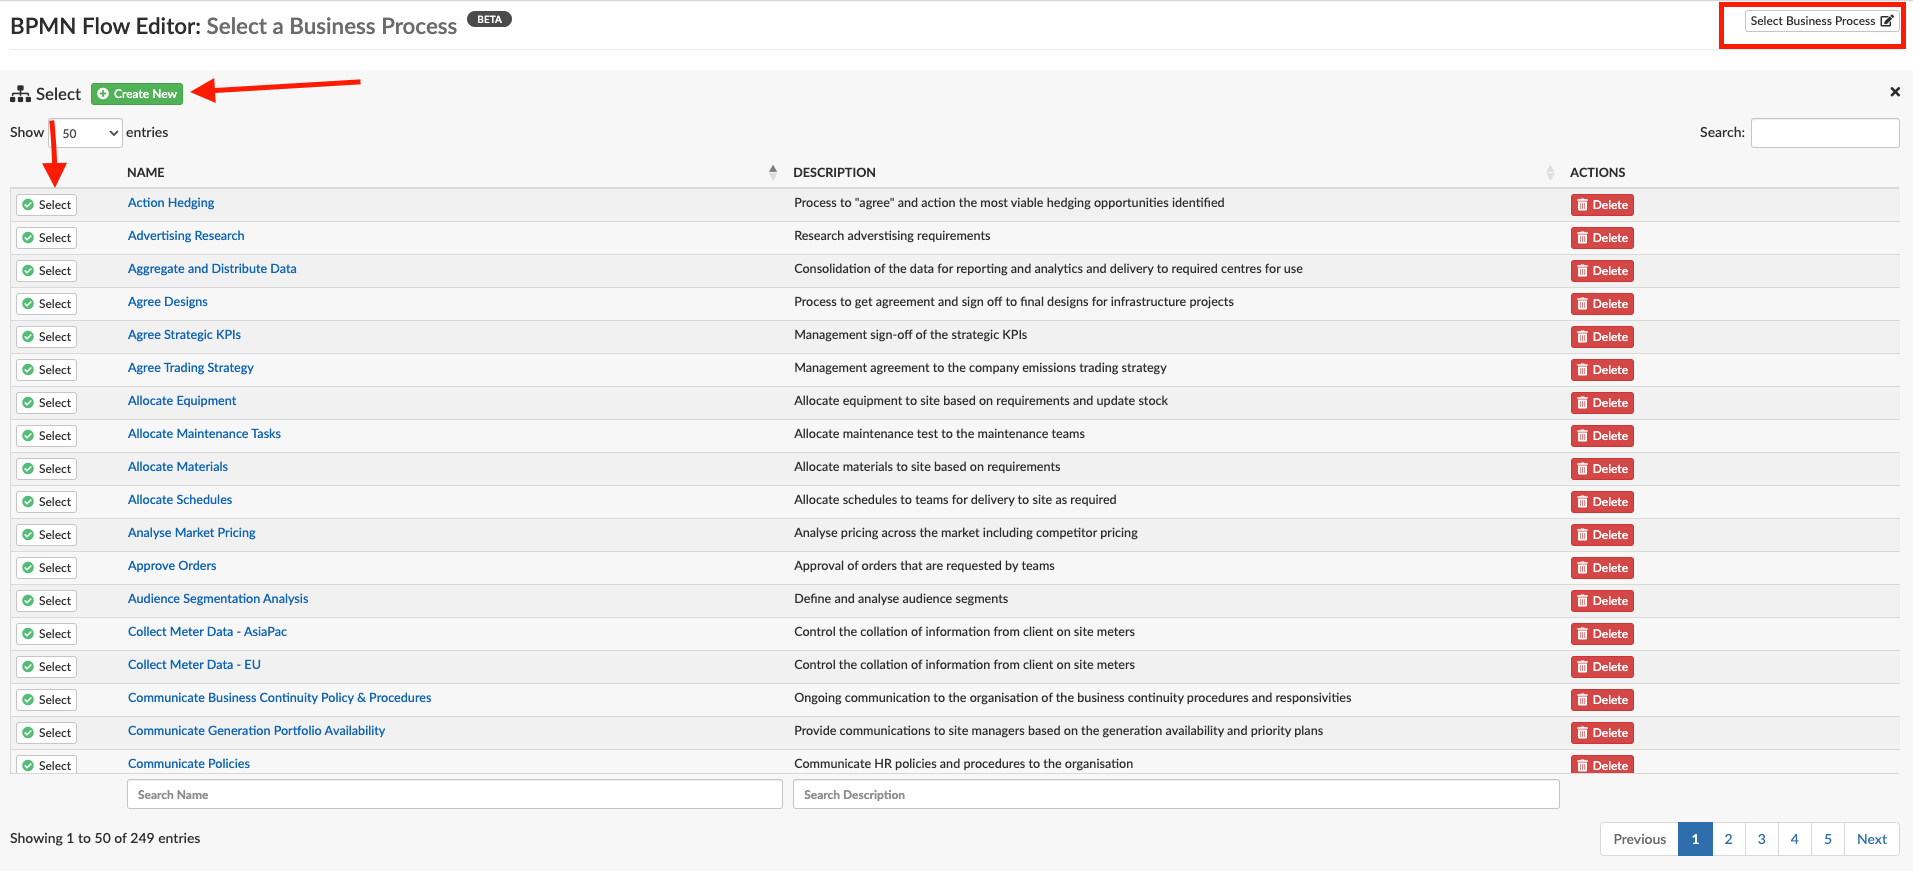
When you first open the editor, click the ‘Select Business Process’ and you will be prompted to select an existing business process or create a new one. You can customise the appearance of each aspect, labels and header size, the body and outline colour of the icons, as well as the colours of text, and flow lines, etc.
NOTE: Currently, the BPMN Editor does not reverse engineer existing flows that were not created using the modeler. Meaning that any existing flows will not display when you select a process that already has a flow defined, but they will still appear in the Business Process Flow View.
When you have created or selected a process. You will see a blank screen with flowchart symbols at the bottom. You can drag and drop these into your swim lanes as you need.
Add a Headered Pool (Conducting Role) and name it. For example, Corporate Client. Choose where you want the label to appear, e.g. Middle. Customise the appearance of the Headered Pool by selecting a colour band and then selecting a new colour.
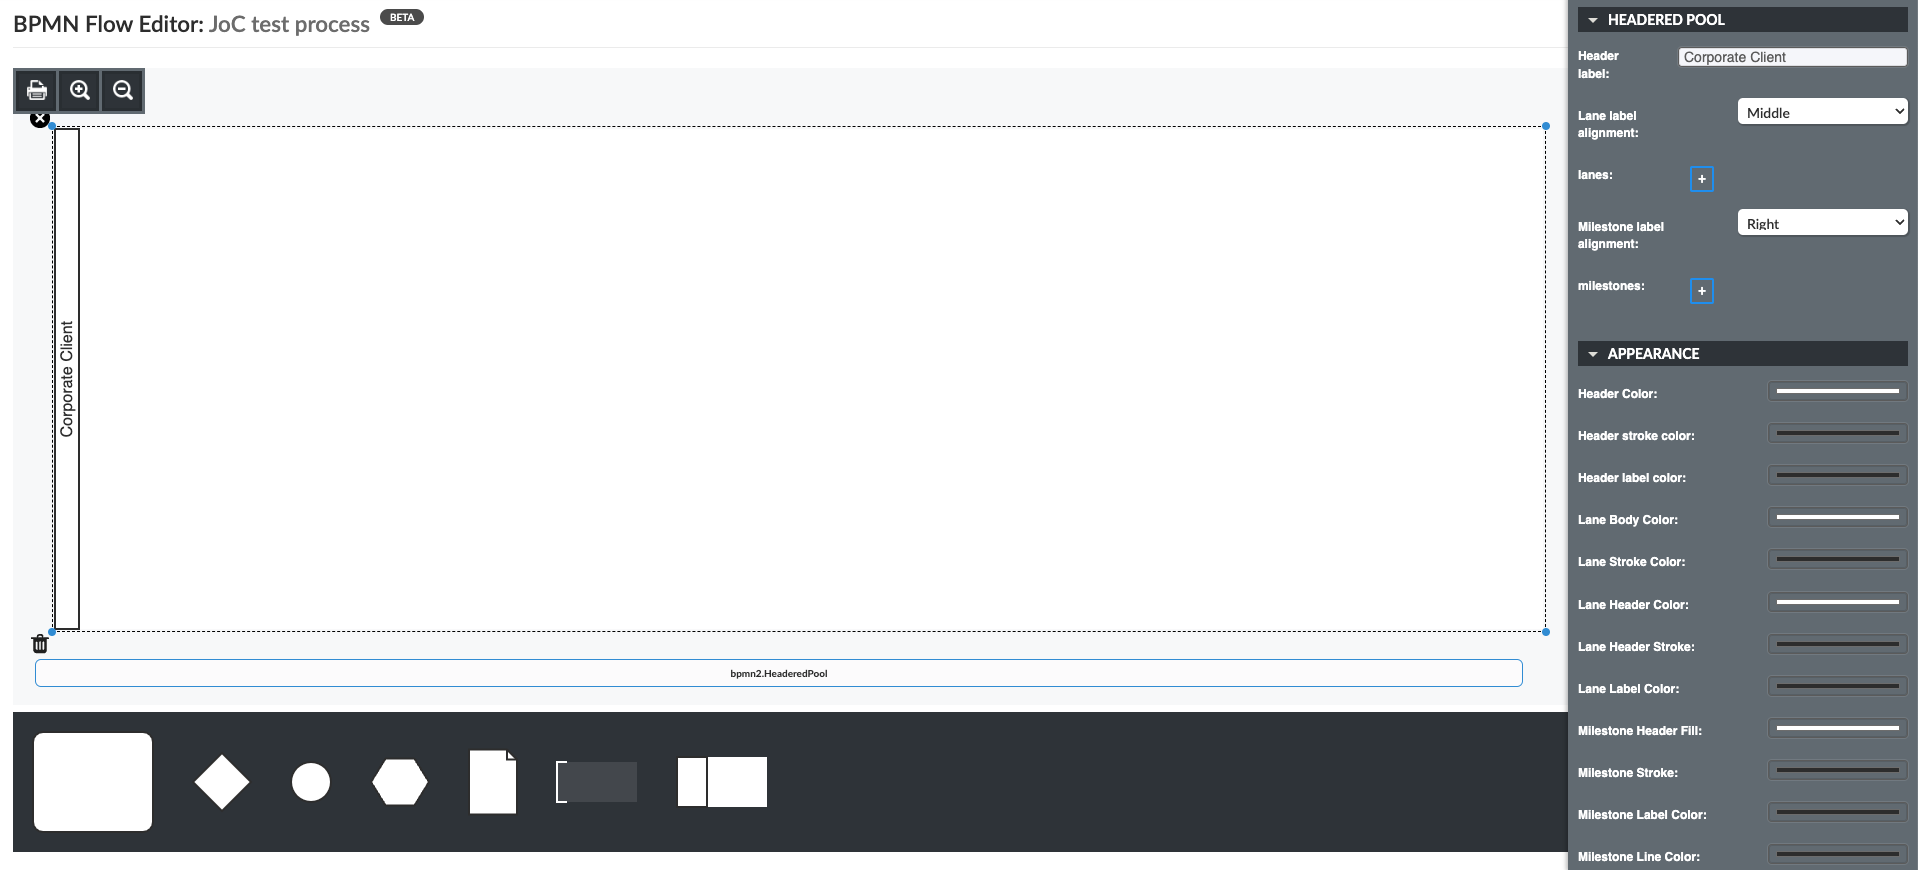
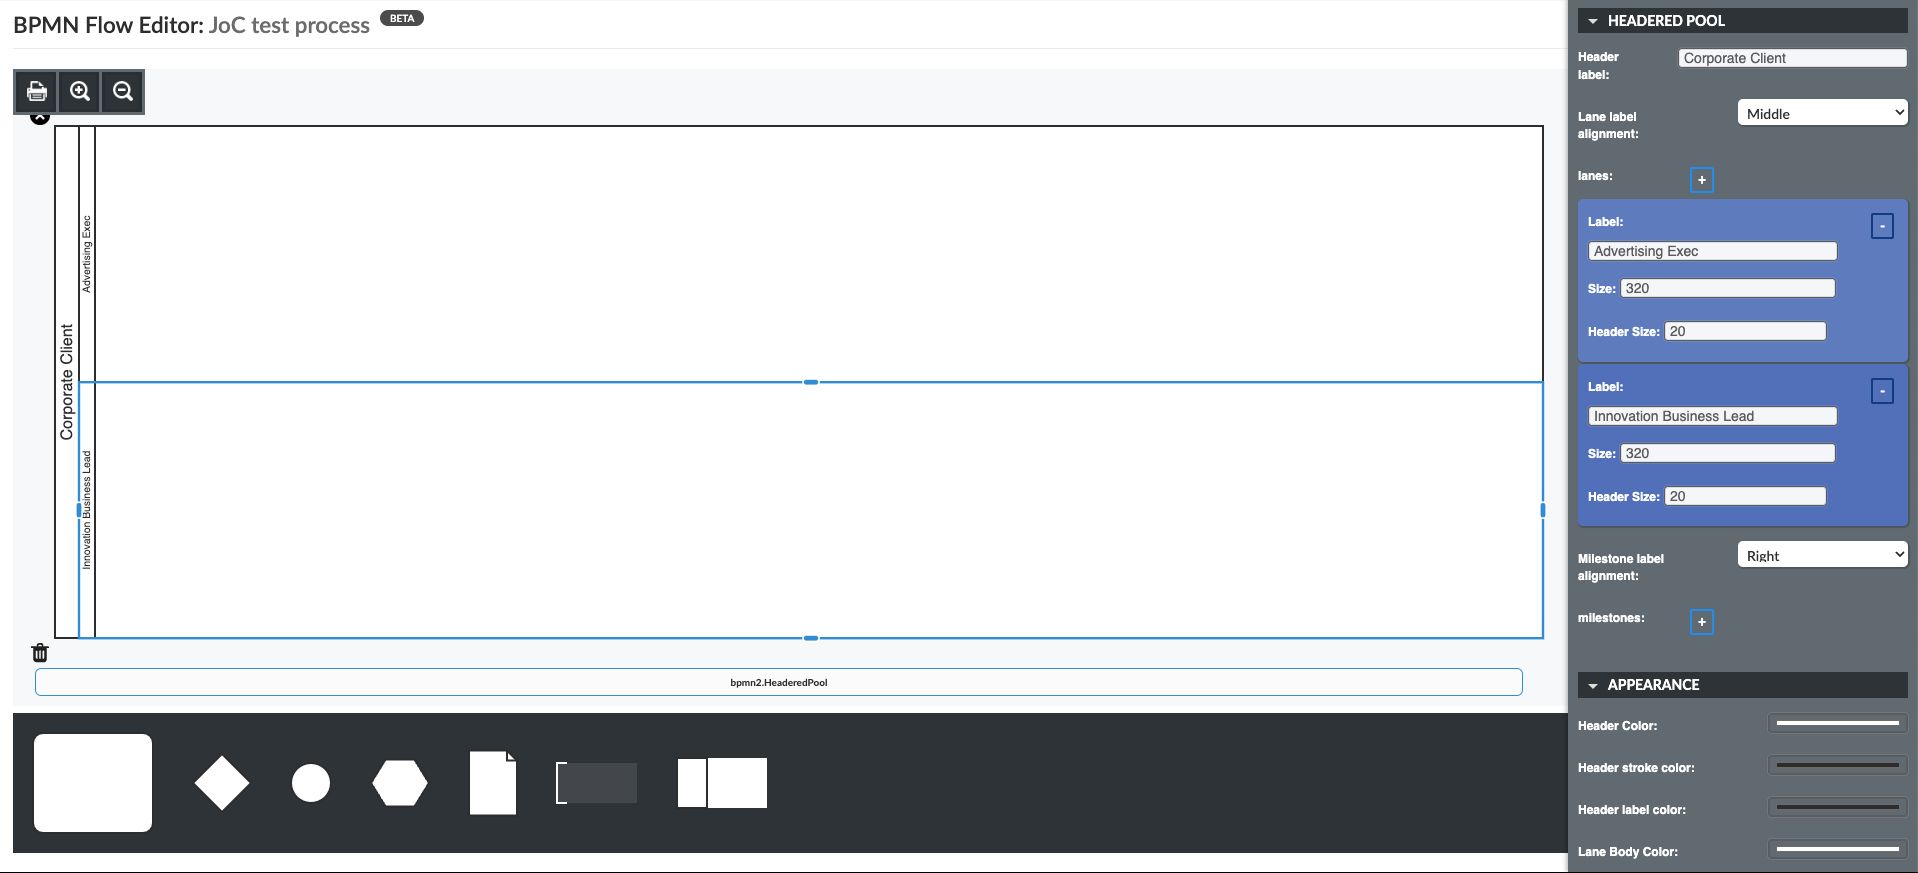
With the Headered Pool selected, use the menu on the right of the page where you can add as many lanes (Performing Role) as required. Label the lanes. You can customise the size of the lanes by dragging the outlines or defining in the Size box, where you can also define the size of the header box. To remove lanes, select the – button.
Once you have all your swim lanes defined, add a Start Event by dragging the circle icon to the corresponding lane, name the event. You can define the event by selecting the Type from the pop-up menu.

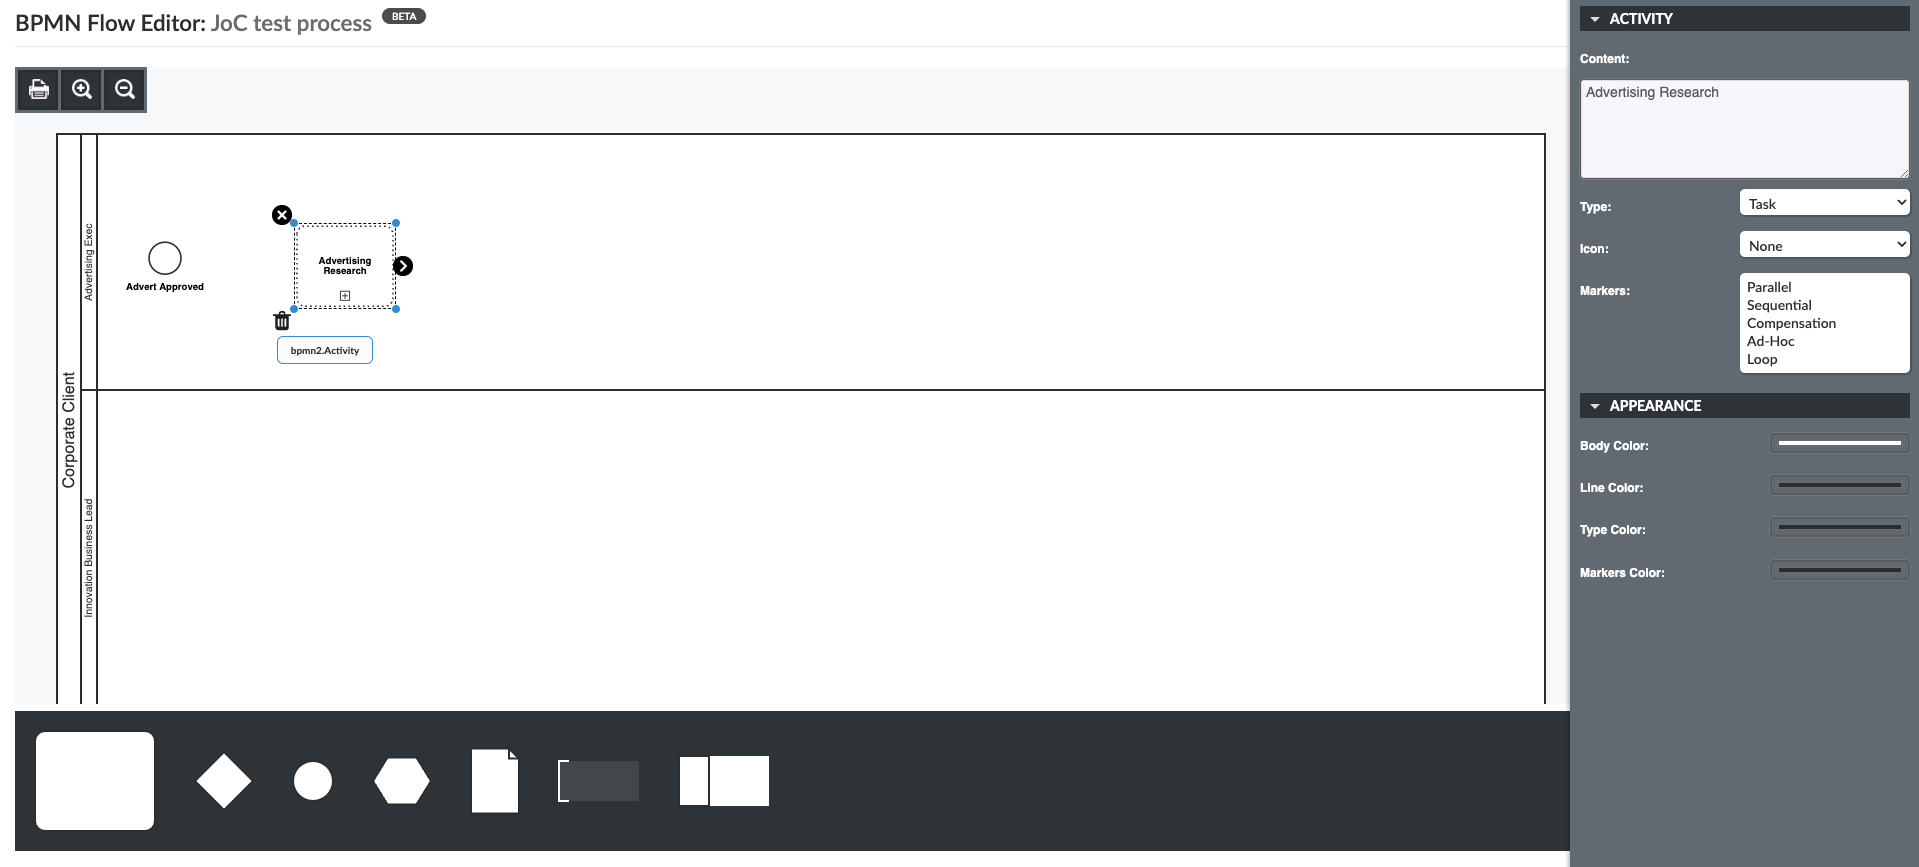
Add the next step in the flow, in this case an Activity. Again, you can define the Type, icon, and for activities, the Markers. As well as the appearance of the icon. Select and hold the arrow from the previous icon (event) and drag it to the Activity, once the activity has a blue outline, release the arrow and the flow will have been captured.
Add another event, change the type to Intermediate. This will slightly change the icon to reflect the event type. Add the arrow from the previous icon.

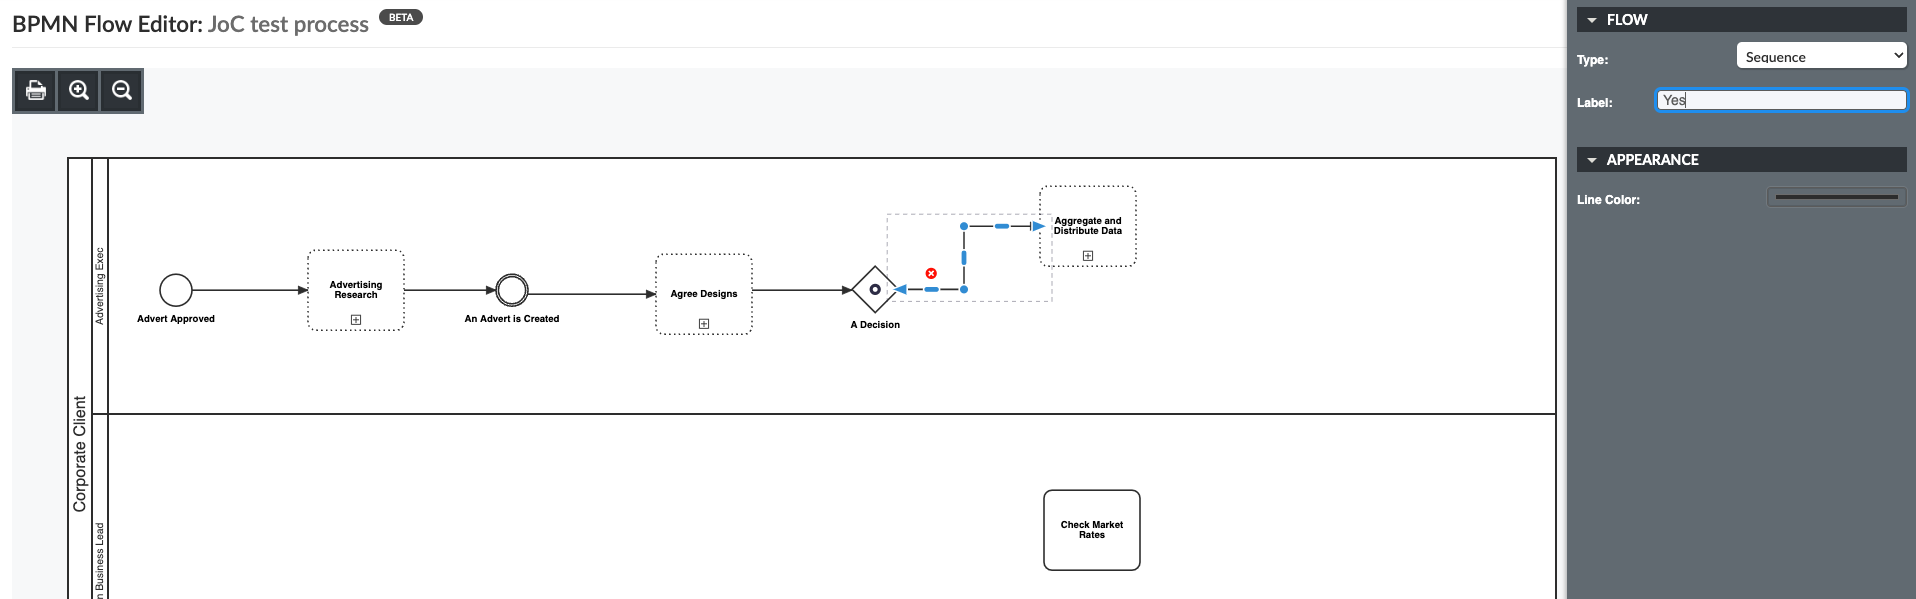
In this example, another activity has been added. After this a gateway has been added. Here, that has been defined as A Decision regarding the example advert. In this case the type is Example_Blank.

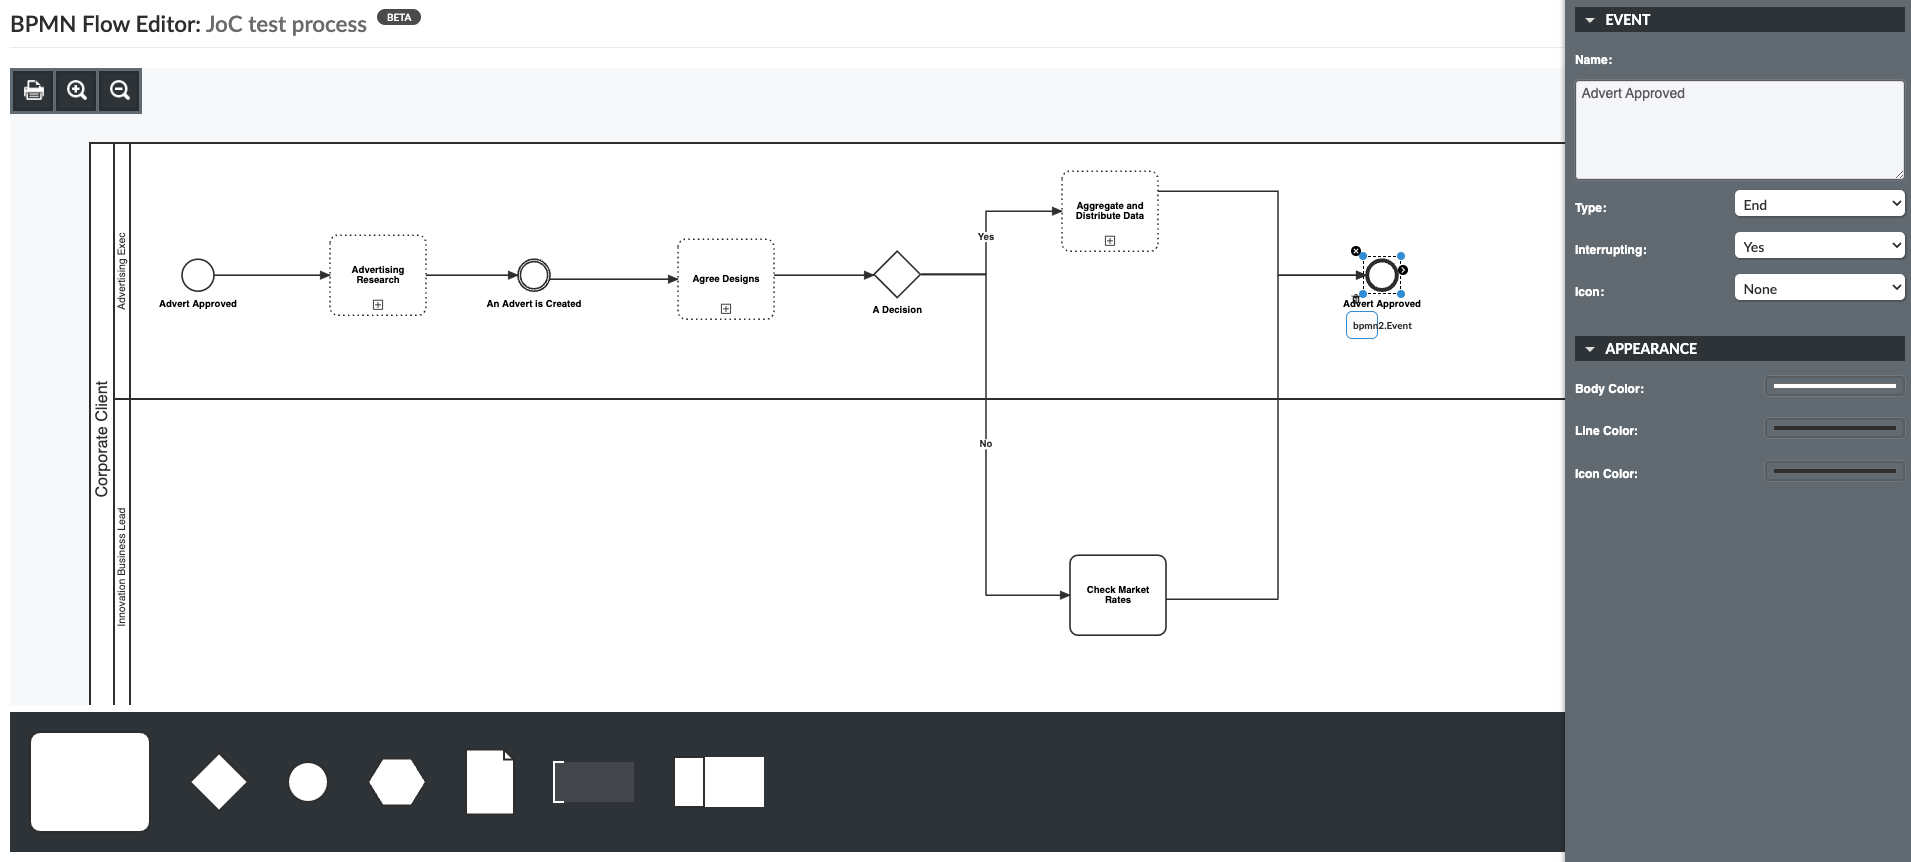
To add multiple options for flow, e.g. Yes and No, drag one arrow from the gateway. Select the arrow and drag the line to create a different level in the flow. In this case, Yes remains in the Advertising Exec lane. It may be easy to capture the activities after the gateway before adding the decision arrows.
For arrows like the one pictured below, drag an arrow horizontally, select it, drag the short blue line on the arrow up. Next drag the arrowhead to the activity until the blue outline appears, linking the gateway to the activity. Selected arrows will now have different points you can drag from. For this example, drag the vertical blue line to the right and the arrow will be as below. You can label the arrows, here shown as Yes and No. These are then each pointed to an activity depending on the gateway answer.
To add the end of the process, drag an event icon to the end of the flow chart. Name the event and define the type. Drag any arrows to the end event.
Enable the BPMN Flow Modeler
If you cannot find the editor in the Business section of your View Library you will need to enable it. From the Class Tree in the Capture Tab, go to EA Class > EA Support > Essential Viewer > Report. In the Instance Browser, find Core: BPMN Process Flow Modeler, select the report and make sure the Enabled box is ticked. Publish to the Viewer and the report will appear in your View Library.
Updated 26 April 2024